Monday, August 15, 2011

Made in Minnesota


Did you know?
All of our kits are hand made and produced locally--right from our 50th and France store!

All of our kits begin as just a twinkle in the eye of Tina, owner of TBM or Suzy, Kit Coordinator. We bring all of our designs to reality by working with Katie our Buyer, to find all of the highest quality products available. We track down kit prices from all over the country and the world to bring the best!


Once all of the necessary pieces arrive, master packer Miracle counts beads and cuts wire to give each kit the parts it needs. When all of the bags are ready, Dana G packages and ties them off with raffia to indicate the "colorway" or arrangement of a color selection .

We have been making and selling our own brand of beading kits for 13 years. During this time we have tested and sold over 120 different types of kits. We currently offer over 60 styles! Our kits make the hobby and art of jewelry making more approachable and we love bringing them to you!


This information can also be found in the current TBM News Letter!
Check out the full News Letter HERE


Monday, August 8, 2011

Employee Sale Artist: Suzy Lindberg
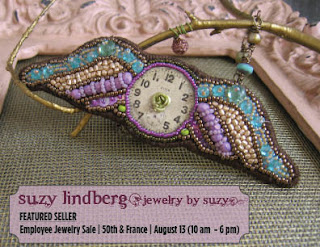


Suzy Lindberg Jewelry by Suzy


Q&A with Suzy:


Describe the type of jewelry you will be selling:

I have been doing a lot of bead embroidery and bead weaving lately, so I will be selling pieces that feature these techniques. I love making something big out of small beads, so I will be featuring some more elabo- rate encrusted pieces like pendants and headbands.


What is your favorite materials to use?

Because I stitch together small beads, I love sequins, crystals and small stone or glass beads. Creating unique color combinations is a fun challenge. I also like to find one-of-a-kind vintage pieces, or less com- monly used supplies and try to use them in a creative way that’s unexpected!


What can we expect to see from you during the sale on August 13?

Earrings, necklaces and more in an eclectic mix of bright colors for summer as well as vintage-inspired tones that are nice and neutral to move into fall. I work in many different styles, so there is something for everyone!


Any other fun selling points about your line?

I love to see what I can make with beads, but I also strive to keep my work relevant and fashion-forward. My jewelry is perfect for anyone who loves to get noticed!


Employee Sale Artist: Miracle Galston


Miracle Galston Applefri Designs


Q&A with Miracle:

“Nature inspired colors are my normal palette.” -Miracle


Describe the type of jewelry you will be selling:

Unique combinations of materials that create a well balanced organic piece. Nature inspired colors are my normal palette.


Describe the type of jewelry you will be selling:

I like to use any material and technique that catches my eye incorporating seed beads for beadweaving to sterling silver and copper for metal working.


What are your favorite materials to use?

A lot of natural earth tones while keeping them chic with my designs. Intricate bead weaving, metal work

Wednesday, July 27, 2011

Employee Sale Artist: Dana Sapala


Dana Sapala

“I’ve been on a vintage-feeling kick. Anything bright and sparkly!” -Dana

Q&A With Dana

*Describe the type of jewelry pieces you will be selling.

Fun rings, sparkly bracelets and necklaces.

*What are your favorite materials to use?

Anything sparkly! Swarovski crystals are my fav! But I am starting to venture into natural stones. J

*What can we expect to see from you during the sale?

Anything bright, and/or sparkly…I’ve also been on a more vintage-feeling kick. Lots of earrings, necklaces and bracelets!

*Any other fun selling points about your jewelry line?

My rings make great gifts!

Monday, July 25, 2011

Employee Sale Artist: Kathy Vang


Kathy Vang

“I don’t really have just one style—I have multiples!” -Kathy

Q&A With Kathy

*Describe the type of jewelry pieces you will be selling.

I am easily inspired by everything—nature, people and even signs I see. I don’t really have just one style—I have multiples!

*What are your favorite materials to use?

I love pearls and color. Pearls are so classy and vintage. J I love playing with color, so all sorts of beads!

*What can we expect to see from you during the sale?

I’m the type of beader that starts out making jewelry as gifts or to sell and then I end up keeping it for myself!

*Any other fun selling points about your jewelry line?

You’ll never see anyone else with the same jewelry!

Thursday, July 21, 2011

Employee Sale Artist: Mitch Hildman


Mitch Hildman

“I like to keep things organic.” -Mitch

Q&A With Mitch

*Describe the type of jewelry pieces you will be selling.

I’ll be selling a lot of woven leather pieces and some things made with semi precious gems.

*What are your favorite materials to use?

Obviously leather cording and other kinds of cording, cotton, hemp etc. I do love gemstones also. I like to keep things organic.

*What can we expect to see from you during the sale?

I should have a wide variety of items made with a lot of natural materials. A lot of my stuff is unisex and should appeal to the earthy side of us all.

*Any other fun selling points about your jewelry line?

I’m trying to reduce my inventory to raise money for a more cohesive line for next year. Come by to see what I come up with for what I have on hand. Should be interesting.

Monday, July 18, 2011

Employee Sale Artist: Katie Best


Katie Best -

kBest Design

“I love colors, shapes and asymmetry. When I see these things in the world around me I am inspired to create my pieces.” –Katie

Q&A With Kaite

*Describe the type of jewelry pieces you will be selling.

I sell necklaces, earrings and bracelets each with their own unique spirit.

*What are your favorite materials to use?

My favorite materials are chain, Swarovski crystal and semi-precious gemstones.

*What can we expect to see from you during the sale?

I will have a collection of handcrafted resin pendants that are like individual paintings you can wear. Also I will have pieces featuring wire wrapping, gemstones and Swarovski crystals.

*Any other fun selling points about your jewelry line?

I love colors, shapes and asymmetry. When I see these things in the world around me I am inspired to create my pieces.

Friday, July 15, 2011

Employee Sale Artist: Ashley Baird


Ashley Baird -

Jolie Vie Designs

“I feel wearing jewelry helps one feel more beautiful, which is why my jewelry line is called Jolie Vie Designs. Jolie Vie is French for beautiful life or pretty life.” –Ashley

Q&A With Ashley

*Describe the type of jewelry pieces you will be selling.

I will be selling earrings, bracelets and necklaces.

*What are your favorite materials to use?

My favorite materials are seed beads, as well as wire. I love how seed beads can come together in bead weaving to create something complex and unique. I enjoy wire because I can link, bend and form it to create jewelry that can be casual or formal. Because I enjoy both, I tend to find myself with a wide variety of jewelry pieces.

*What can we expect to see from you during the sale?

I have a lot of gold and neutral, blue, green, purple and pink colors in a variety of shades. The majority of my pieces can be worn every day. However, I also have several pieces that can be worn to more formal events, because they include many Swarovski crystals and more complex bead weaving techniques. I believe all of my pieces can either be dressed up or down depending on what they’re paired with.

*Any other fun selling points about your jewelry line?

Variety is what I strive for and I think I achieve it because I use many different techniques. I also use many different materials from Swarovski crystals to seed beads to semi-precious stones and more. My jewelry is fun, affordable and one-of-a-kind. Another fun selling point of mine is to use a variety of clasps, like snaps, to finish off some of my bead weaving projects. I put a lot of effort into my pieces to make them the best they can be. My goal is to help create a beautiful life for others, and to me a beautiful life includes wearing handmade, artistic jewelry created by local artists.

Tuesday, June 14, 2011

Make it Personal! Make it for Dad!


The upcoming Father’s Day weekend has us thinking of our favorite paternal marvels and wondering how we could express our love for them through a meaningful gift.

Our favorite idea this year is a monogrammed secret message pendant! The focal piece of this design is two separate metal blanks attached together on a single jump ring. The front blank is stamped with dad’s initials - it’s simple, clean, nothing too cutesy. The second blank hides behind the monogrammed pendant with a secret note that only he knows about. This concealed message of love and special meaning will always be there for him to find.

Add a leather cord to finish the necklace and you have a sharp, thoughtful gift for dad!

Check out our helpful YouTube video on metal stamping to learn how easy it is to personalize metal blanks on your own!

For another man friendly look, personalized pendants can also be paired up on a metal ball chain necklace to imitate the look of military dog tags. If your pop isn’t the type to wear jewelry, stamped blanks can easily be incorporated into other personalized gifts such as key chains and bookmarks!


Gentleman Jewelry Trend

Cufflinks and watches are no longer the only way for men to add stylish detail to their look. Men’s jewelry has been gaining in popularity and is expected to stick around as a trend. In recent years, many men have become increasingly style-conscious. More and more often, their look includes accessories such as bracelets or necklaces to add personality.

Men’s jewelry often showcases organic components. Popular choices for stringing materials include leather, suede and other natural cording. Beads made of wood, stone, shell and bone are most commonly used. These types of beads offer a less feminine look and also tend to have larger holes, serving a dual purpose when trying to combine them with thicker stringing materials such as leather.

We think that the best presents are handmade gifts from the heart, so gather your letter stamps, leather and all your boy-friendly beads. We can’t wait to see your man-tastic creations!

Friday, March 11, 2011

Employee Bead Challenge - Battle: Sprockets


The votes are in and we have a winner for The Bead Monkey Employee Bead Challenge, Battle: Sprockets.  Employees were given 10 brightly colored acrylic sprockets and charged to make whatever their little hearts desired.  The only rule: each submission must contain at least 2 sprockets.  Voting happened on Facebook with TBM customers “liking” their favorite piece.

"Blue Buds" - Kathy - Design/Merchandising
Kathy’s “Blue Buds” were the crowd favorite!  To make these dangling darlings Kathy flattened a Vintaj bead cap and used a Vintaj blank.  A tiny screw and nut combo secures the pieces together and adds interest.  Adorable.  Congratulations, Kathy!!  You win a Bead Monkey gift card, a special gift pack from Tina, the owner, and the bragging rights.  In preliminary design stages, Kathy was also showing off a nifty riveted sprocket necklace that incorporated chain and metal stamping.  The necklace wasn’t submitted, as it only featured one sprocket, but we definitely plan to use more bright color with our Vintaj brass after seeing how well the two combine!  See more of Kathy’s work in our sample cases and classrooms- she’s our merchandising and teaching superstar. 

Our first runner-up is a tie between Mitch and Suzy.  Mitch is our web guru and he designed “Summer Fun”.  It’s an ultra-wearable lariat with leather, silk cord and base metal spacers.  We loved the bright colors and playful design!  Perfect for a day at the beach or paired with a tank top!!   
Our kit crew chief and newsletter designer Suzy’s “Pignons de Printemps” is an elaborate confection in glitter, fabric, wire and deliciously chunky pearls.  Our favorite part?  The “twig connector” made from a spray-painted twig and decorated with a perfect little bird’s nest.  We’re definitely stealing Suzy’s springtastic color palette for our next design.

Two of our sprocketeers went above and beyond the call of duty and design and created utterly phenomenal pieces that showcased The Bead Monkey’s latest obsession: bead embroidery and embellishment.  Kearstin from St. Paul was responsible for “Mermaid Navigator”, an asymmetrical piece featuring a bead-embellished mermaid.  She rounded out the design with “seaweed”: sequin and sprocket dangles, crystals, CZs and stone and added a bold clasp.  We love how Kearstin integrated chain, spockets, jump rings, wire links and sequins in unique design sections to create a playful piece.  
If you’ve got an eye for detail, then you probably loved Katie H.’s “Garden of Beadin” as much as we did.  Look very closely and you’ll see bugs, buds, a plethora of grassy-green detail and the cutest little serpent in the world- complete with eyes and a juicy apple in its mouth!  Katie made her own bracelet form for this design using heavy gauged wire- we’re excited to use this method to make our own crazy-cool cuff!

Our beadweaving fanatics got inspired by the sprockets, too!  Jeanie created “Twirly Sprockets” a peyote bracelet that cleverly uses a sprocket for the closure.  The citrus shades work great with matte turquoise and we love how she combined delicas with seed beads for a wavy pattern.   

If you like a beaded bezel, then you have to check out Ashley’s “Shifting Gears”!!  It’s springtime bright and vibrant and we’re totally stealing the design to make a blingy bracelet out of Swarovski rivolis.

Lindsay and Kajsa created playful sprocket pieces that scream “Springtime”!  Kajsa, our bright color queen, put together a piece that shows just how much fun you can have with rivets.  Not only did Kajsa use one of our favorite color combos (red and turquoise) she repurposed tabs to create the spunky star design. Nothing like saving the planet  one piece of jewelry at a time!  Lindsay’s “Spring Garden” reminds us why pink and green are a fail-safe combo.  Who doesn’t love a leafy green paired with a vibrant pink?!  Just add a little Czech glass for sparkle and you’re set!  We’re also in awe of Lindsay’s tidy wire work on these earrings, from teensy little bails to the flawless wire wraps, they’re sheer perfection.

We’ve always loved designs with an edge and we’re adoring “Sprocket Punk”, Autumn’s complete set of jewelry.   You’ve got admire her devotion to the sprocket challenge, she stayed up until 5 am stitching and bezeling and showed up with the completed peyote bracelet the day after the challenge was announced.  We can’t decide which piece we like the best, so it’s a lucky thing they can all be worn together. 

Some of the Bead Monkeys weren’t content with the natural shades of the sprockets, so they played with different mediums to achieve metallic or muted effects.  Katie B., buyer extraordinaire, watered down acrylic paint to coat her sprockets and achieve a less vibrant shade, then she added bronze seed beads and a glass drop.  Katie’s “Cog in the Wheel” utilized only beads and components she already had.  We admire her discipline! Erin, your blogging friend and office Gal Friday, couldn’t help herself and used this challenge as an opportunity to incorporate her favorite finds from the store: Swarovski cup chain and rivolis, brand-new links and crystal rhinestones.  She spent an afternoon bonding with epoxy to attach the up-eyes to the ends of the sprockets, playing with her trusty can of bronze spray paint and setting rhinestones.  The result: “Sparkle-Me-Sprockets”.   
Christy is our fearless leader, General Manager and resident classy lady, so it was no surprise when she submitted a tasteful statement ring, “Ring Around the Sprocket” in matte and shiny bronze, cool blue and mauve beads with matching sprockets covered in metallic nail polish.  Sophistication, thy name be sprocket.

We noticed that votes have continued to come in, even after our winner was announced.  Please continue to vote and leave comments on your favorite pieces- we’re all about sharing the love and gushing over a job well done! If you loved Battle: Sprockets, stay tuned for news of the next Employee Bead Challenge coming soon!

Wednesday, February 9, 2011

Share the Love


Remember when you first discovered beading?

How much fun it was to walk into your first bead store and marvel that there could be so many beads? To feel completely giddy about how much that you could do with three little tools or a needle and some thread? To be totally blissed out with the heaven on earth that is a bead store?

It was like being a kid in a candy store…

Now think about being a kid in a bead store.

A kid: a darling little moppet with a love of all things artsy and craftsy, bursting with creativity. Think about all the fun you could have if you were set loose with the right skills! Here at The Bead Monkey, we love kids! We love their creative energy and boundless enthusiasm, and we offer classes and camps with teachers that especially love working with them.

For anybody over the age of 10, (this includes you) try the "Young and Young at Heart" classes. They’re great classes for you, your little buddy or both of you. In “Soda Pop” your little monkey-in-the-making will learn how to use ICE Resin, image papers and transfers along with bottle caps to make personalized pendants, while in “Tile Pendants” you can use fast-drying UV Resin and bails to make pendants out of wooden game tiles! You don’t have to come as a pair but it is more fun that way. Adults welcome and kids can come alone.


For crafting duos of all types, we’ve got the “Me and My Shadow” classes- designed specifically for beading teams. Check out “Polymer Clay Transfers” and make professional-looking pieces with a personal touch- or get in on the basics of stringing, crimping and drop earrings with “Elements: Me and My Shadow”. 10 – 15 year olds must have a mentor with them but if you are 16+ and - like Punxsutawney Phil - don’t have a shadow you can attend without a buddy.


We’ve also got Summer Bead Camp with different levels to foster young artists along their journey in stringing, crimping, wire work, resin, bead weaving and metal work. This year, we’ve added the all-new Bead Camp 3, featuring more advanced projects and cool new skills. Check back for details coming soon!

If your budding designer is ready to fly solo - they can check out our new kid’s section, full of colorful beads and charms in a variety of sizes and materials! It’s a playground of pieces full of fun for boys and girls.


Friday, February 4, 2011

Flower Power!


A little while back, Christy, our general manager, made a necklace that immediately floored me.  This fabulous statement piece featured 10 beaded flowers of various sizes mounted on a chain base. 

It was love at first sight.
I loved the colors.
I loved the textures.
But mostly, I loved the sheer SIZE of the thing.  It was bright and cheerful and in every way a wearable work of art.

I needed to have one for my very own.
This necklace appeared to me for the first time when we were shooting the newsletter photos for the ‘Blossoms Workshop’ to be held in Spring semester of 2011.  By the time we created the Minneapolis Blossoms display, I was poring over it to find exactly the right beads.
At first I was stalled by all the color options-  and the variety of sizes available.  How many big blossoms did I want? How many little?  The labradorite is delicious, while this Czech glass lovely, and the Swarovski briolettes made me positively giddy.
Eventually, I got further inspiration from one of the Swarovski Crystal Cocktails that Kathy mixes up, a tube of muted colors that seemed made just for me.
With that in mind, I set about picking my beads.  I basically grabbed everything I could find in the Light Amethyst, Sand Opal, Golden Shadow, Silver Shade and Light Azore family.  I used the Vintage Bronze Artistic Wire that’s my default metal of choice.
I decided that if one necklace is good- two necklaces is better- so I designed a couple of pieces that were similar to Christy’s statement piece that can be worn together or separately.  I am super excited with the results!
If you are my blossom soul-sister check out the Blossoms Workshop with Katie (we’ve added some in April)… you’ll gain crazy blossom making skills and she’ll go over the techniques to turn your blossoms into hairpins, pendants or a killer statement piece.


Wednesday, January 19, 2011

Metalwork Open Studio


Hola faithful readers this is Erin- your blogging friend.  In addition to writing the fabulous Bead Monkey blog,  I also supervise the Metalwork Open Studio in St Paul. 

What’s “Metalwork Open Studio” and why don’t I “teach” it?

Metalwork Open Studio is a metalworking playground for anyone who’s taken a Bead Monkey metal class.  Think Texture, Patina and Polish, Fine Silver, Argentium or Wire Fusing, Torch Soldering or Soldered Settings, Riveting, Cold Connections, Monogrammed Pendant, and Letterpress.  It doesn’t have a formal teacher because it’s a chance for you to use skills you’ve already learned, along with Bead Monkey tools. 

One of the Bead Monkeys (Aleece in Minneapolis or Erin in St. Paul) is just hanging out in the studio to give helpful tips and tricks and to help make sure you have access to all the tools you need.

The Open Studio is great if you’ve taken multiple metalworking classes and want to experiment with integrating all your skills into one project OR if you want to work on multiple projects in a short period of time.  We take care of the set-up and tear down, so you don’t need to worry about the mess, hassle and expense of setting up your own studio.  It’s a great opportunity to play with tools before you buy them and get another teacher’s tips and tricks on your favorite projects.  Perhaps the best feature of the Open Studio is that it’s uninterrupted creative time- I’ve found I’m far more productive when I’m working in dedicated studio space than I am when I work at home simply because I’m free from distractions.

The other great thing about Open Studio is that I’m there to provide gentle reminders if they’re needed.  Has it been awhile since you’ve taken that stamping class?  No big deal.  I’ll give you a hand and remind you not to use a rubber mallet with the letter punches or help with which end of the screw punch fits a 1/16” eyelet. 

Doesn’t all this sound like fun?  It is. You know you want to join us.

Check out the fun stuff I made in the December Open Studio!!